













Figma file upload components


File upload design in Figma: drop zones, progress, and errors
Uploading is one of the few interactions in a product that genuinely fails on a regular basis. The file is 40MB, the format is wrong, the office wifi drops halfway through, someone picks a folder instead of a file.
Most upload mockups show a dashed rectangle and one finished row, which is the single state that needs the least design work. The 3 file upload components and 23 variants above cover the rest of it, including the parts nobody enjoys drawing.
The drop zone is the smaller half
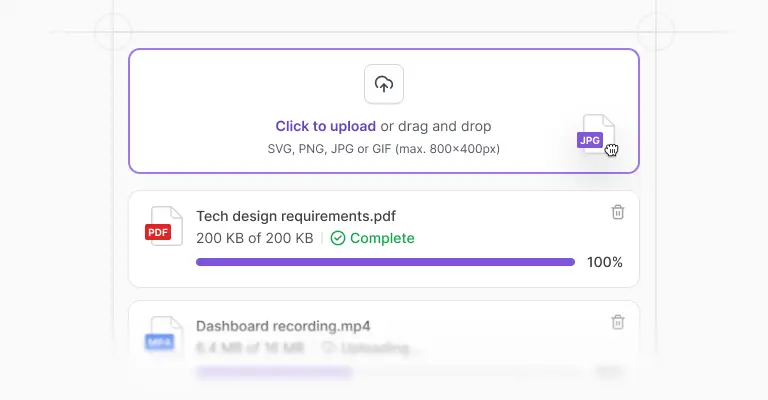
The drop zone itself is a 512px block on desktop with three states: default, hover for when a file is being dragged over it, and disabled for when uploading is not currently allowed. That hover state is doing more work than it looks. It is the only confirmation a user gets that the browser has accepted their drag and that letting go will do something, and without a distinct treatment people hover uncertainly and then drop the file on the page behind it.
Underneath sits the real component, the file row, and the assembled uploader ships with and without a queue so you can show the empty state and the working state side by side at 512px desktop and 343px mobile.
Two ways to show progress, and when each fits
Every file row comes in two treatments. The progress bar type gives each file a dedicated track under its name, which suits larger files where the number matters. The progress fill type does without a separate track, which is why those rows run 74px against the bar type's 98px, and it suits small files that finish in a second or two.
Nielsen Norman Group's guidance on progress indicators is worth applying literally here: past ten seconds people need a percentage rather than a looping animation, and their research found users tolerate a wait roughly three times longer when they can see it moving. Uploads cross ten seconds constantly, so a determinate bar is close to mandatory.
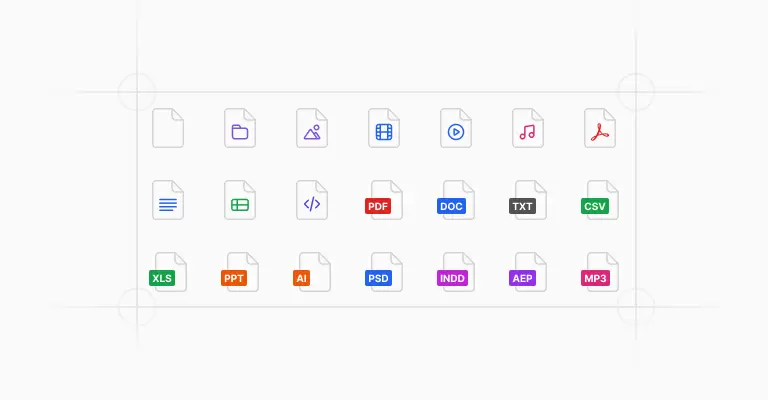
Each row also chooses between a file type icon, which shows the format at a glance and pairs with the file icon set, and a simple icon for interfaces that would rather stay quiet. Everything ships in light and dark.
Design the failure before the success
Every combination of type and icon includes an error state, and those rows are built taller than their in-progress counterparts for a reason: a failed upload has to say what went wrong on the row itself, next to the file it happened to, not in a banner at the top of the page that scrolls away.
"Upload failed" is not a message. "File exceeds 10MB limit" and "PDF, PNG or JPG only" are, and both of them let the user fix it without guessing. Failures should also be per file rather than per batch, since one rejected image out of six should not discard the other five. Design that row properly and most of your upload support tickets never get written.
Drag and drop is never the only route
A drop zone with no click-to-browse link inside it is not minimalism, it is a dead end for anyone using a keyboard, a screen reader, or a phone. WCAG 2.2 asks that anything operable by dragging also work with a single pointer, and the same principle is why the drop zones here carry a visible click target rather than relying on the gesture alone.
In Figma the gesture is worth faking rather than skipping: wire the default drop zone to the hover variant, then to a queued state, and your prototype tells the story in three clicks. For flows where the upload sits inside a dialog, the modal components include a file upload layout already assembled.
When it is time to build, the same uploaders exist in code. Untitled UI React file uploaders are open source, built with Tailwind CSS and React Aria, with drag-and-drop, keyboard file selection, and per-file progress handled for you.
Frequently asked questions
What states does a file upload component need?
More than most mockups include. The drop zone needs default, drag-over, and disabled. Each file row needs in progress, complete, and error, with the error text specific enough to act on.
If uploads can be cancelled or retried, those are targets on the row too. This set covers the drop zone and row states; cancel and retry behavior is worth agreeing with your developers early.
How do I prototype a drag and drop upload in Figma?
Do not try to simulate the drag itself. Wire a click on the drop zone to its hover variant, then to a frame showing one file in progress, then to the complete state, optionally with a short delay between them.
Three interactions communicate the whole flow, and testers read it exactly as intended. Note the real drag-and-drop behavior in handoff instead of animating it.
Should upload progress be a bar or a spinner?
A bar, for anything over ten seconds, which covers most real uploads. A spinner tells users something is happening but not how long it will take, and uncertainty is what makes people abandon or hit the button twice.
Show the percentage or the transferred size, and keep it on the file's own row so a queue of five reports five separate states.
Are these file upload components included in the free version?
The file uploaders are part of the paid Untitled UI Figma kit. See pricing for what's included.
The 100% free Figma UI kit includes core components from the same system, including progress indicators, if you want to try it first.
Is there a React version of these file uploaders?
Yes. Untitled UI React file uploaders are open source, built with Tailwind CSS and React Aria, and mirror these Figma components.
Drop zone handling, keyboard-accessible file selection, and per-file progress are built in.
Foundation Figma components and styles
Figma base components



Shared Figma assets



Application UI/Dashboard examples
Application UI/Dashboard Figma components


Marketing website examples














What is Untitled UI?



















Untitled UI is the best $ I've spent on my business in a long time. I'm going to keep using it and recommending it to every designer I know.


Over the years we've featured hundreds of UI kits on UXCrush, but Untitled UI is by far the most comprehensive and detailed I've seen yet. A must have for any designer!

I've used all UI kits on the market. I can say without a doubt that the Untitled UI kit is the best on the market. It covers everything a designer needs in a modern and efficient way.

Incredible, and keeps getting better. I’ve tried dozens of UI kits and Untitled UI is the only name you should care about. It stands head and shoulders above the rest.

Such a beautiful, detailed, and extensive UI kit. Untitled UI is the perfect foundation for any project. I highly recommend this huge time saver.

Untitled UI has been an amazing resource that I'm learning to rely upon to spin up ideas in no time. I think I might launch a startup pretty soon by mistake here!

The sheer scale, details, and organization of this kit is mind-blowing. It covers nearly everything a Designer could need in a modern, efficient and systematic way.

I'm super impressed with this. I love poking around in other peoples UI Kits to see how they think. This is probably one of the most comprehensive I've seen.

I'm super excited to use this for quick mockups of ideas in Figma. We're always trying to streamline our design process so we can move fast! Definitely recommend.

Untitled UI is easily the best UI kit I've used so far. It has an insane amount of components that are all incredibly well-built. I don't even know how many hours this will save.

The attention to detail and thought Jordan has put into this UI kit is unparalleled.

Untitled UI is incredibly well-organized and the attention to detail is great. I highly recommend this kit to any designer that wants to create beautiful designs fast.

What an awesome Figma kit... it's an absolute game changer. This is the perfect base for any design system. The size and attention to detail is next level.

We've been using Untitled to build Himalayas 2.0 and have finished a complete redesign in just a few days. It has everything we need already pixel-perfect.